Sustainability audits were never designed to generate revenue.They were created to satisfy regulators, reassure stakeholders, and tick compliance checkboxes. But the market has changed. Today, sustainability performance directly influences carbon credit value, ESG financing access, procurement eligibility, and brand trust. In this new landscape, audits are no longer passive documents—they are economic signals. And blockchain is the technology that converts those signals into marketable assets. For businesses investing in carbon reduction projects, renewable infrastructure, or ESG programs, blockchain-enhanced sustainability audits represent a strategic opportunity: turning verified impact into tradable value. This article explores how blockchain transforms sustainability audits from static reports into revenue-generating infrastructure, and why companies that act early gain a measurable financial advantage. The Hidden Problem with Traditional Sustainability Audits Despite their importance, most sustainability audits still operate on outdated assumptions: These limitations create friction when audits are used beyond compliance—especially in carbon markets, where every claim must withstand scrutiny from registries, buyers, and regulators. The result? In short, traditional audits destroy value the moment they should be creating it. Blockchain Changes the Role of Sustainability Audits Blockchain doesn’t just “secure” audit data. It redefines what an audit is. When sustainability data is recorded on a blockchain: This creates a single source of truth that can be trusted by: The audit stops being a snapshot in time and becomes a living, verifiable asset. From Compliance Artifact to Market Infrastructure The most important shift blockchain enables is this: Audits move from “proof of compliance” to “proof of value.” Blockchain-backed sustainability audits can be directly integrated into: This integration removes friction between audit completion and monetization. 1. Earning Opportunity : Faster and More Valuable Carbon Credit Issuance Carbon markets reward credibility, traceability, and speed. Blockchain-enabled audits help businesses: This leads to: Projects backed by blockchain-verifiable audits often command premium pricing, because buyers face less reputational and regulatory risk. For project developers, this directly improves credit yield per ton. 2. Earning Opportunity: Premium Positioning in Voluntary Carbon Markets Voluntary carbon markets are evolving rapidly. Buyers no longer accept generic offsets—they demand: Blockchain-enhanced audits enable: This allows businesses to: In a market increasingly plagued by trust issues, verified transparency becomes a pricing lever. 3. Earning Opportunity: ESG-Linked Financing and Capital Access Financial institutions are tying lending terms to sustainability performance—but only when that performance is provable. Blockchain-based sustainability audits: For businesses, this translates into: Audit data becomes a financial credential, not just a reporting obligation. Why Generic Sustainability Tools Fail at Scale Many organizations attempt to digitize audits using off-the-shelf tools. These systems often fail because they: Blockchain-based platforms, when custom-built, solve these issues by design: This is why leading organizations move toward custom carbon credit trading platforms, not generic dashboards. The Strategic Advantage of Owning the Platform The biggest opportunity is not just issuing carbon credits. It’s controlling the infrastructure that produces them. Businesses that invest in blockchain-enabled audit and trading platforms gain: Over time, the platform itself becomes an asset—capable of generating revenue through: Real-World Scenario: Turning Sustainability Audits into Revenue Assets Consider a renewable energy developer operating projects across multiple geographies. Under Traditional Audit Models Each project undergoes standalone verification, often with different auditors and timelines. Audit data is stored in disconnected systems and must be repeatedly revalidated for every buyer, registry, or financing partner. As a result: Despite genuine environmental impact, much of the value is lost to process friction and trust gaps. With Blockchain-Enabled Audits and Trading Infrastructure Audit data is recorded immutably and integrated directly into a carbon credit trading platform. Emissions baselines, monitoring data, and verification records remain continuously accessible and tamper-proof. This enables: Business Outcome The same sustainability effort now delivers higher and more predictable returns, improved market access, and stronger long-term buyer relationships—without increasing operational complexity. Blockchain doesn’t change the project.It changes how efficiently value is unlocked from it. Why Platform Development Matters More Than Technology Choice Blockchain alone doesn’t create value. Value comes from how it’s implemented: This is why carbon credit trading platform development requires: Without this, even the best technology fails to monetize impact. The Business Case Is Clear Sustainability audits are no longer a regulatory afterthought. When powered by blockchain, they become: Companies that recognize this shift early gain: Final Thoughts: The Future Belongs to Audit-Driven Markets The future of sustainability is not about reporting more data.It’s about proving impact in ways the market can trust—and pay for. Blockchain-enhanced sustainability audits make this shift possible by turning verification into value, compliance into confidence, and environmental performance into a measurable economic asset. For businesses serious about carbon markets, ESG leadership, and long-term value creation, the question is no longer whether to adopt blockchain. It’s how strategically to design and implement systems that convert verified impact into sustainable revenue. This is where platform thinking matters—integrating audits, compliance logic, carbon credit issuance, and trading into a single, scalable infrastructure. If you’re exploring how to transform sustainability audits into monetizable carbon assets, Techaroha helps enterprises design, build, and implement blockchain-enabled carbon credit trading platforms tailored to real market requirements. 👉 Start the conversation here: Contact Techaroha
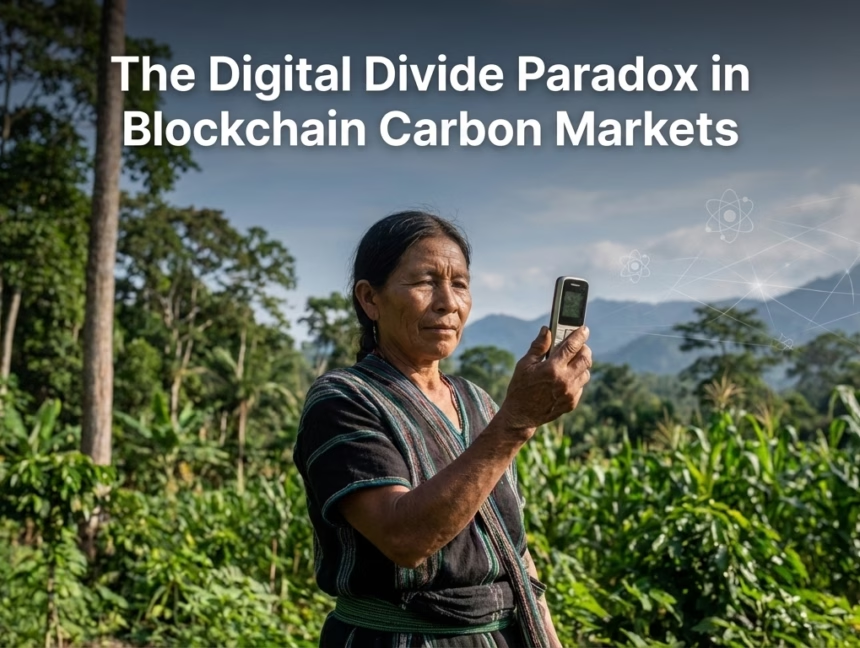
The global narrative surrounding climate tech is currently dominated by a single, shimmering promise: Blockchain will democratize the carbon markets. By tokenizing carbon credits, we are told, we can strip away the opaque layers of traditional finance, eliminate predatory brokers, and allow a direct flow of capital from a Silicon Valley tech giant to a smallholder farmer in Kenya. On paper, it is the ultimate win-win for decentralization and the planet. If blockchain carbon markets are designed for always-on connectivity, financial literacy, and self-custody, they will systematically exclude the very communities they claim to empower. However, as we rush toward this “On-Chain” future, we are ignoring a burgeoning irony. In our effort to dismantle traditional gatekeepers, we are inadvertently erecting a digital wall. This is the Digital Divide Paradox: the very communities most capable of generating high-quality, nature-based carbon credits-indigenous tribes, rural farmers, and conservationists in the Global South-are the ones least equipped to navigate the technical labyrinth of the blockchain. Where Carbon Lives, Connectivity Doesn’t: 5G Dreams vs. 2G Realities The primary source of “Nature-Based Solutions” (NbS) resides in the world’s most remote biodiverse regions. These are areas where carbon sequestration isn’t just a corporate buzzword; it’s the result of regenerative agriculture and forest stewardship. Blockchain systems, however, are built on the assumption of seamless connectivity. To interact with a decentralized ledger, a project developer typically needs: In reality, many communities in the “Carbon Belt” (regions around the equator with high sequestration potential) still operate in low-bandwidth environments. When a carbon credit platform requires high-resolution satellite imagery uploads or real-time IoT sensor data to mint a token, the local steward is immediately disadvantaged. The irony is sharp: The closer you are to the carbon, the further you often are from the ledger. From Brokers to Technocrats Blockchain’s greatest marketing point is “disintermediation”-the removal of the middleman. But for a community leader in a rural village, “being your own bank” is a terrifying proposition. Understanding private keys, gas fees, seed phrases, and liquidity pools requires a level of digital literacy that remains a luxury. When we replace a traditional carbon broker with a complex smart contract interface, we haven’t necessarily empowered the farmer; we have simply traded one type of gatekeeper for another. The Rise of the “Digital Middleman” We are already seeing a new class of intermediaries: technical consultants who bridge the gap between the forest and the blockchain. While many are well-intentioned, this knowledge asymmetry creates a power vacuum. If a community doesn’t understand the underlying tokenomics of their own carbon credits, they risk: The Financial Exclusion Loop While blockchain promises to reduce transaction costs and eliminate rent-seeking intermediaries, the reality for small, community-led carbon projects is often the opposite. The barrier has not disappeared-it has simply shifted upstream into digital onboarding and infrastructure. For many micro-projects in the Global South, the economics do not scale favorably. In multiple pilot nature-based projects, total onboarding and verification costs-including digital MRV setup, hardware, training, and platform integration exceed USD $3,000 before a single carbon credit is issued or sold. For projects generating only a few hundred tons of CO₂ per year, this upfront burden can erase profitability entirely. Expense Category Traditional Market Barrier Blockchain Market Barrier Verification High fees for manual auditors (e.g., Verra, Gold Standard) High upfront costs for Digital MRV (IoT sensors, drones, satellite data, software integration) Transaction Opaque brokerage commissions (often up to 30%) Network “gas” fees (volatile), bridge fees, and exchange slippage Setup Years of bureaucratic paperwork Smartphones, data plans, wallets, custody solutions, and technical training The result is a financial exclusion loop. Smallholder farmers and indigenous-led projects-often generating fewer than 500 tCO₂ annually-face a harsh reality:transaction, verification, and digital infrastructure costs can consume over 50% of total project revenue, even on lower-fee Layer 2 networks. This creates a systemic bias. Large monoculture plantations and industrial-scale forestry projects can amortize these fixed costs across thousands of credits, while diverse, community-based projects are priced out before they ever reach the market. What emerges is a “pay-to-play” ecosystem-one that unintentionally favors scale over stewardship. In this model, decentralization does not democratize access. Instead, it risks reinforcing the same inequalities carbon markets were meant to solve, only now encoded in smart contracts and platform fee structures. Building the Bridge: Design Principles for Inclusive Carbon Markets If blockchain-based carbon markets are to avoid reproducing existing inequalities, inclusion must be treated as a design constraint, not a downstream fix. The goal is not to make communities adapt to blockchain, but to make blockchain adapt to real-world conditions. Design Principle #1: Assume Low Bandwidth by Default Carbon-rich regions are often connectivity-poor. Platforms should be usable in 2G or intermittent network environments, with offline-first data collection and delayed synchronization. High-resolution uploads, always-on dashboards, and real-time validation should be optional-not mandatory. If a system fails without constant connectivity, it will fail the communities closest to the carbon. Design Principle #2: Separate Custody from Participation Requiring every farmer to manage private keys or wallets creates unnecessary risk. Participation in carbon markets should not depend on self-custody or crypto literacy. Platforms should support custodial, hybrid, or abstracted wallet models where individuals can earn, verify, and receive payments without ever touching seed phrases, gas fees, or exchanges. Design Principle #3: Aggregate at the Community Level Expecting individual smallholders to onboard independently is inefficient and exclusionary. A cooperative “hub-and-spoke” model, where a trusted local entity manages digital infrastructure, MRV tooling, and market access, allows costs to be pooled and bargaining power to be shared. This mirrors successful agricultural and mobile-money cooperatives, translating collective stewardship into collective market participation. Design Principle #4: Make Blockchain Invisible Blockchain should function as back-end infrastructure, not a user experience. Farmers should interact through familiar tools-SMS, mobile money, local cooperatives-while cryptographic guarantees operate quietly in the background. If users must understand the chain to benefit from it, the system has already failed its inclusivity test. Anti-Patterns to Avoid: When “Decentralization” Becomes Exclusion As blockchain carbon markets mature, many well-intentioned projects repeat the same
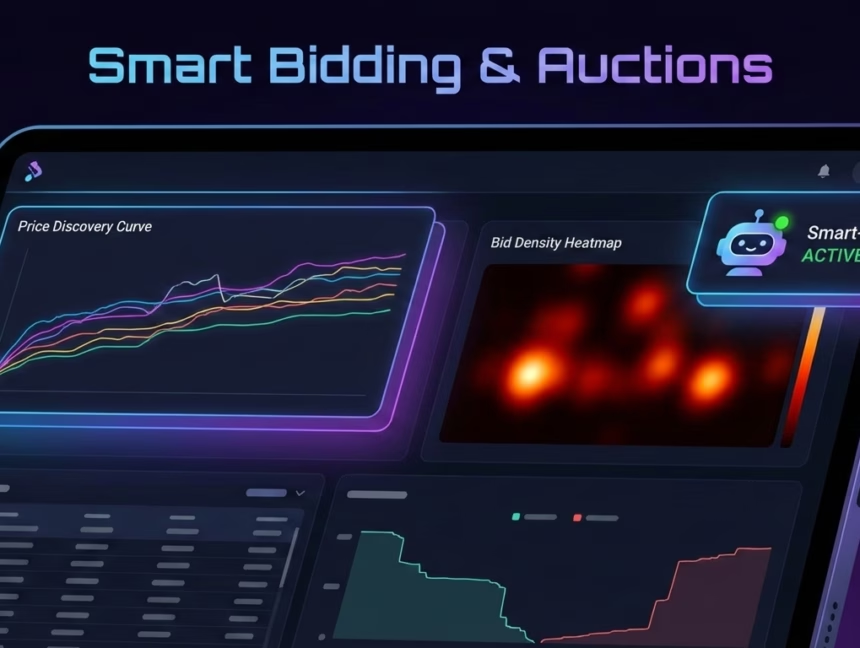
Most platforms mistakenly treat carbon auctions like eBay, yet carbon is a heterogeneous asset with deeply nuanced value drivers. When a buyer overpays, or a developer undersells, it isn’t merely a poor trade-it is a fundamental failure of Price Discovery that erodes market trust. Manual bidding processes frequently trigger the “Winner’s Curse,” where buyers overpay due to information asymmetry. This volatility creates a “Liquidity Trap,” scaring away the institutional capital necessary to scale global climate solutions effectively. The Shift from Static to Dynamic: What is ‘Smart Bidding’? In a legacy setup, buyers use “limit orders”- a blunt instrument that ignores the context of the credit. Our SaaS introduces Smart Bidding: proprietary algorithms that dynamically adjust your bid based on a multi-factor analysis of vintage, co-benefit methodology, and real-time demand. It moves the market from “set and forget” to “analyze and optimize.” Traditional auctions are “Blind,” offering no feedback until the hammer falls. Smart Bidding introduces Price Signaling. It enables buyers to participate in multiple, concurrent auctions, autonomously shifting budgets to where the “Environmental Alpha”– the highest integrity credit at the most efficient price point- is most accessible. This isn’t just bidding; it’s programmatic portfolio construction. Why ‘Fair Value’ is the Only Metric That Matters The Problem: The Greenwashing Gauntlet In today’s hyper-scrutinized ESG landscape, large corporations face an existential threat: greenwashing accusations. It’s no longer enough to simply “buy carbon credits” to meet net-zero targets. The market has matured beyond a simple transaction; corporate buyers are demanding verifiable impact and, crucially, transparent, justifiable pricing. The cheapest credit can quickly become the most expensive if it leads to reputational damage or regulatory backlash. What they truly seek is fair value: a price that accurately reflects the environmental integrity, co-benefit quality, and market-validated scarcity of a credit, not merely the lowest available number. This demand for fairness is driven by the need to demonstrate genuine climate action to stakeholders, investors, and increasingly, regulators. A perceived overpayment can signal inefficiency, while an underpayment might hint at low-quality, questionable offsets. The SaaS Solution: Algorithmic Consensus & Market Integrity This is precisely where advanced auction mechanisms, optimized by AI, become indispensable. Our platform moves beyond basic “first-price” auctions where the highest bidder simply wins, often falling prey to the Winner’s Curse. Instead, we deploy sophisticated protocols like Vickrey-style auctions or AI-optimized Dutch auctions. A Vickrey auction, for instance, ensures participants bid their true valuation, but the winner pays the second-highest bid. This design inherently drives participants toward honest valuation, fostering genuine price discovery. When augmented by AI, these mechanisms analyze bid density, project specifics, and market sentiment in real-time. This ensures the final transaction price reflects a true market consensus, stripping away the distortions caused by individual buyer desperation or seller opportunism. The result is a price point that is not only efficient but also robustly defensible in any ESG report, solidifying trust and fostering a healthier, more transparent market. The Multi-Project Bid Example: The Fortune 500’s Smart Mandate Imagine a Fortune 500 corporation, “Global Corp,” committed to offsetting 100,000 tons of CO2e. Traditionally, this would involve weeks of manual negotiation, due diligence on multiple projects, and the inherent risk of committing to a single, large batch. Instead, Global Corp leverages our platform’s Smart Mandate feature. Their sustainability team inputs their key criteria: 100k tons, a preference for nature-based solutions (afforestation), a maximum average price per ton, and a minimum co-benefit score. They set their strategic parameters, and the platform takes over. The Result: Instantaneous Portfolio Optimization With the Smart Mandate activated, our system autonomously begins scanning, evaluating, and bidding across a curated selection of five different afforestation projects concurrently listed in various auctions. Project A might offer a slightly higher price but boasts exceptional biodiversity co-benefits. Project B is cheaper but has a later vintage. The AI constantly adjusts bids, factoring in Global Corp’s strategic priorities against real-time market dynamics. In milliseconds, the system executes a series of optimized micro-bids across these projects. It intelligently balances the aggregate price, the overall project risk profile (e.g., diversifying across geographies), and the weighted average co-benefit score. This level of instantaneous, multi-dimensional portfolio construction is simply beyond human capability. A human trader trying to achieve this manually would incur significant “slippage”-missed opportunities and suboptimal pricing due to delays and processing limitations. The Smart Mandate ensures Global Corp achieves its 100k-ton goal, perfectly aligned with its sustainability objectives, at the most efficient, defensible fair value possible. The Developer’s Advantage: Retaining Upside The Flip Side: Preventing the “Fire Sale” Most market commentary fixates on the buyer, but a marketplace is only as strong as its supply side. In the current fragmented landscape, project developers-the very people doing the groundwork of reforestation or methane capture—often fall victim to “fire sales.” When an auction is poorly timed or lacks sufficient participant density, high-quality credits are frequently liquidated at prices far below their intrinsic value. This Revenue Leakage doesn’t just hurt the developer; it starves the project of the capital needed for long-term monitoring and community co-benefits. The Perspective: Reserve Price Optimization (RPO) Our SaaS platform introduces a safeguard: Reserve Price Optimization. By using historical data and real-time demand forecasting, the platform helps developers set intelligent, dynamic price floors. Instead of a static “minimum,” RPO adjusts based on the “velocity” of incoming bids. If demand spikes during an auction-perhaps due to a new corporate net-zero announcement or a policy shift-the platform ensures the developer captures that upside. This prevents “money being left on the table.” By maximizing the Capital Efficiency of every credit sold, we ensure that a higher percentage of investment flows directly back into the field. In this model, the developer isn’t just a price-taker; they are an empowered participant in a fair-value ecosystem. Conclusion: The Infrastructure of Integrity The next era of carbon trading won’t be won by those who simply hoard the most credits, but by those with the best Bidding Infrastructure. By prioritizing transparent price discovery and smart auction mechanics, we move beyond speculation. Fair value
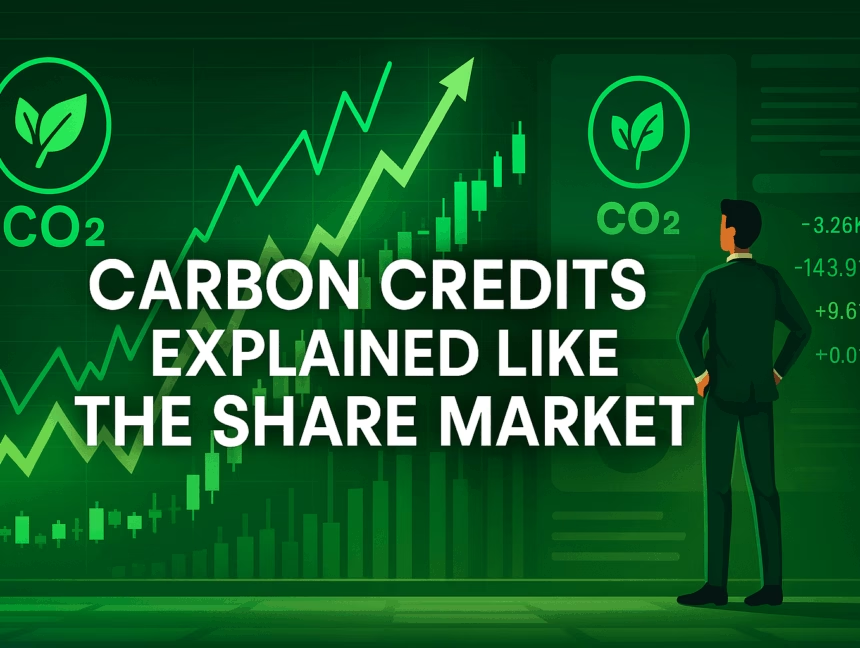
Imagine a market where pollution carries a price tag and cutting emissions creates tradeable assets worth billions. That’s the carbon credit market-one of the fastest-growing financial ecosystems of our time. With valuations set to soar from USD 1.4 billion today to as high as USD 250 billion by 2050, carbon credits are becoming the next big frontier for investors hungry for profit and impact. What Exactly Are Carbon Credits? The Stock Market Parallel Think of carbon credits as shares in the environment. Just as a stock certificate represents ownership in a company, a carbon credit represents one metric ton of carbon dioxide (or equivalent greenhouse gas) that has been removed from the atmosphere or prevented from entering it. Here’s where it gets interesting for investors: these aren’t abstract environmental tokens. They’re tradeable financial instruments with real market prices, supply-demand dynamics, and profit potential. There are two primary types of carbon credits, similar to how the stock market has different classes of securities: Carbon Allowances (Compliance Market) function like government-issued permits. Governments set a cap on total emissions and distribute allowances to companies, essentially limiting how much they can pollute. If a company emits less than its allowance, it can sell the surplus. If it exceeds its limit, it must buy additional allowances or face penalties. Think of these as regulated securities traded on formal exchanges. Carbon Offsets (Voluntary Market) work more like corporate bonds-companies voluntarily purchase these credits to offset their emissions by funding projects that reduce or remove greenhouse gases. These credits come from projects like renewable energy installations, reforestation initiatives, or carbon capture technology. The key distinction? Allowances are about permission to emit (trading pollution permits), while offsets are about compensation for emissions already released (paying for environmental projects elsewhere). The Market Mechanics: How Carbon Credit Trading Actually Works If you understand how stock markets operate, you’ll grasp carbon markets quickly. The fundamental principle is identical: supply meets demand through transparent trading platforms, and prices fluctuate based on market forces. The Supply Side: Project Developers as “IPOs” Carbon credits enter the market through environmental projects, similar to how companies enter stock markets through IPOs. Here’s the process: Project Creation: Developers identify opportunities to reduce emissions-building wind farms, protecting forests, capturing methane from landfills, or implementing energy efficiency improvements. Validation & Verification: Independent third-party auditors (think of them as the SEC of carbon markets) verify that projects genuinely reduce emissions and meet strict quality standards. This prevents “greenwashing” and ensures credit integrity. Credit Issuance: For every verified ton of CO2 prevented or removed, one carbon credit is issued with a unique serial number, preventing double-counting. Market Entry: Credits are listed on registries and become available for trading on various platforms and exchanges. The Demand Side: Who’s Buying and Why? Multiple buyer categories create demand, each with distinct motivations: Compliance Buyers: Companies in regulated industries (utilities, manufacturing, aviation) must purchase credits to meet government-mandated emission caps. This creates guaranteed demand similar to dividend-paying utilities-stable, predictable, and growing. Voluntary Corporate Buyers: Companies like Meta, Apple, and Netflix purchase credits to meet net-zero commitments and enhance their ESG credentials. Tech giants are leading the charge towards net-zero targets by 2030, while major mining companies and energy giants are making similar commitments. Financial Investors: Hedge funds, banks, and institutional investors trade carbon credits for profit, bringing liquidity and sophistication to the market. Among new entrants in voluntary carbon markets in 2021, oil and gas majors, hedge funds, and banks were among the most active players. Speculators: Traders betting on future price appreciation, similar to commodity futures traders. Trading Platforms: The Stock Exchanges of Carbon Just as stocks trade on NYSE, NASDAQ, or BSE, carbon credits trade on specialized platforms. The market infrastructure mirrors traditional financial markets with increasing sophistication. Major exchanges for carbon credits include New York-based Xpansiv CBL and Singapore-based AirCarbon Exchange, which have created standardized products to simplify trading. In 2022, Zerocap partnered with ANZ Bank and Beta Carbon to successfully trade tokenized Australian carbon credits using blockchain technology. The European Union Emissions Trading System (EU ETS), launched in 2005, remains the most liquid and mature carbon futures exchange. The EU carbon futures market has surged over 1,400% in the last five years, demonstrating the explosive growth potential that early investors have captured. Other major trading systems include: Price Dynamics: Understanding Carbon Credit Valuations Like stocks, carbon credit prices fluctuate based on supply, demand, and market sentiment. However, several unique factors drive valuations: Quality and Type: Not all carbon credits trade at equal prices. Removal credits (which actively remove CO2 from the atmosphere through technology or nature) command premium prices compared to avoidance credits (which prevent future emissions). Removal credits recently accounted for about a third of retirement value, around USD 500 million, despite historically representing less than 20% of market value. Vintage Year: The year a credit was issued affects its value. Recent vintages typically trade at higher prices as they reflect current standards and methodologies. Project Type: Credits from nature-based solutions (forestry, agriculture) often trade differently than technology-based solutions (renewable energy, carbon capture). Investors can choose exposure based on their preferences, similar to selecting growth stocks versus value stocks. Regulatory Environment: Government policies dramatically impact prices. Stricter emission caps, new climate legislation, or carbon border adjustment mechanisms can send prices soaring. Market Sentiment: Corporate net-zero commitments, climate conferences, and public awareness all influence demand and pricing. Current market conditions show interesting dynamics. Average spot prices for carbon credits were around USD 4.8 per tCO2e in 2024, down 20% from 2023, creating potential entry opportunities for value-oriented investors who believe in long-term market growth. Investment Vehicles: How to Get Exposure For investors wanting carbon credit exposure, several pathways exist, each with different risk-return profiles: Direct Carbon Credit Investment Purchase credits directly from project developers or through brokers, then hold and sell when prices appreciate. This approach requires understanding project quality, verification standards, and market timing-essentially like picking individual stocks. Carbon Futures and Options Trade futures contracts on major exchanges,