What is SugarCRM and Why SugarCRM Load Testing is must?
SugarCRM is the world’s largest open source CRM (customer relationship management) software. These custom business applications can be used in a multitude of ways, such as to power sales teams, run customer support organizations, and manage customer information databases.With the passage of time, the data in SugarCRM increases significantly and load on hosting server start increasing resulting into decreased performance making SugarCRM Load Testing a must to do task.
Why we Use Jmeter for SugarCRM Load Testing?
Performance Testingis crucial to determine that the web application under test will satisfy high load requirements. It can be used to analyze overall server performance under heavy load.Jmeter is the best tool to complete sugarcrm load testing.
JMeter offers the following benefit in Performance testing:
JMeter can be used to test the performance of both static resources such as JavaScript and HTML, as well as dynamic resources, such as JSP, Servlets, and AJAX.
JMeter can discover maximum number of concurrent users that your website can handle
JMeter provides a variety of graphical analyses of performance reports.
JMeter Performance Testing includes:
Load Testing: Modeling the expected usage by simulating multiple user access the Web services concurrently.
Stress Testing: Every web server has a maximum load capacity. When the load goes beyond the limit, the web server start responding slowly and produce errors. The purpose of the stress testing is to find the maximum load the web server can handle.
How to do Load Testing Of SugarCRM ?
By using the Recording Controller we can easily record the Test script and use it for the load testing.
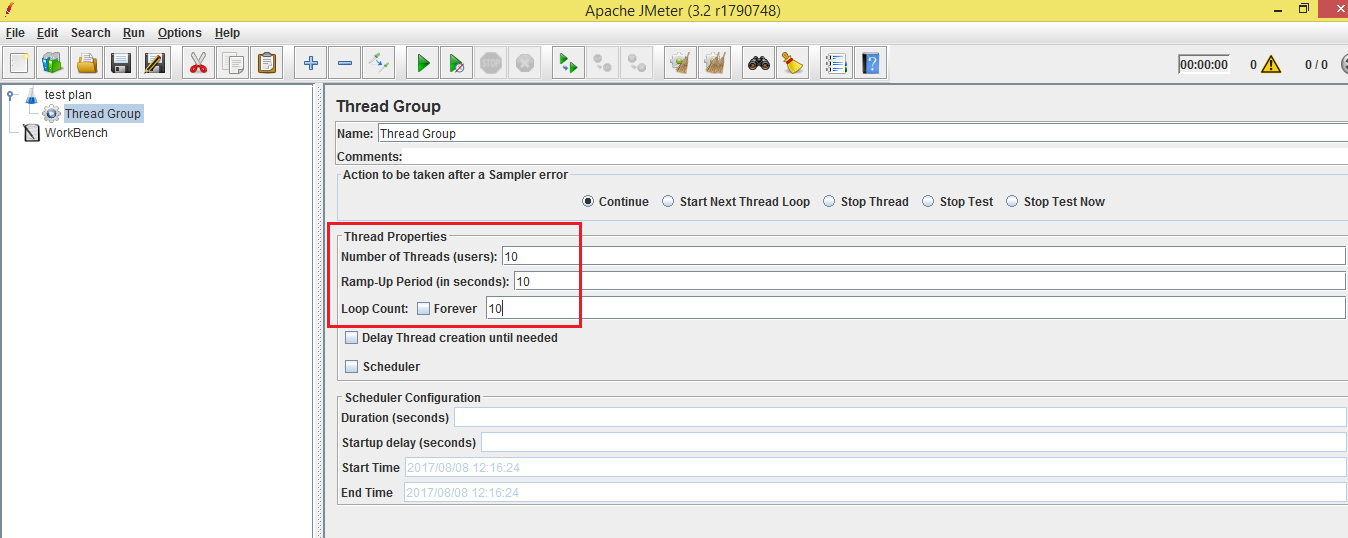
Step 1: Need below software
Apache JMeter – Download and run the .bat/.sh file from the bin folder. (.bat for window & .sh for Linux)
Java – Download and proper installation of Java.
Mozilla Firefox – Download and proper installation of Mozilla.
Step 2: Run the .bat file from the bin folder.
Step 3: Build a test plan
Add the Thread Group to Test Plan – Right-click on Test Plan > Add > Threads (Users)> Add > Thread Group
You can also rename your Test Plan , Thread users and Thread Group
In Thread Group Fields: Number of Threads– Total number of users which we want to hit on the server.For example: – here we will hit the 10 users at a time on the server. Ramp-Up Period– Time given the next user to hit on the server.For example: – Suppose we have 10 users (Number of Thread) and Ramp up period is 10. Then we are giving each user 1 second to hit the server. Loop Count– We want to execute the same operation two times continuously then we need to increase the loop count as 1. It means 10 people will hit the server one time.
Step 4: Add HTTP Request Defaults Right-Click on Thread Group –> Add–> Config Elements –> HTTP Request Defaults We are added the HTTP Request Defaults causes we will send the multiple requests to the same web server
HTTP Request Defaults contain the two important parts-
Server Name or IP
Port Number
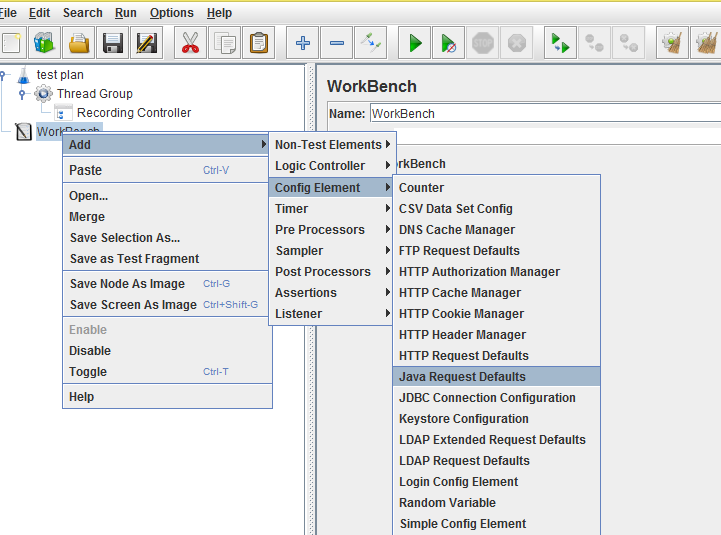
Server Name or IP: Enter the url or IP address of the site on which you want to perform the load testing.( Here I am using Server Name :crm.ihealthassist.in)
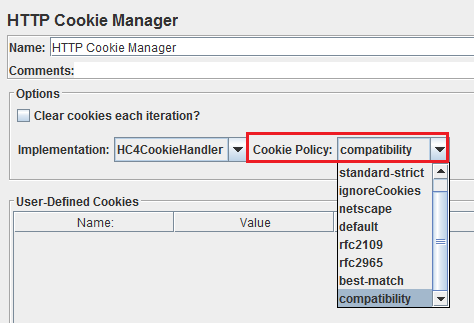
Port Number: Enter the default port number 8888.
Step 5: Add the HTTP Cookie Manager
Right Click on Thread Group –> Add–> Config Elements –> HTTP Cookie Manager
After selecting HTTP Cookie Manager make changes in Cookie Policy by selecting Compatibility option.
Step 6: Add the Recording Controller
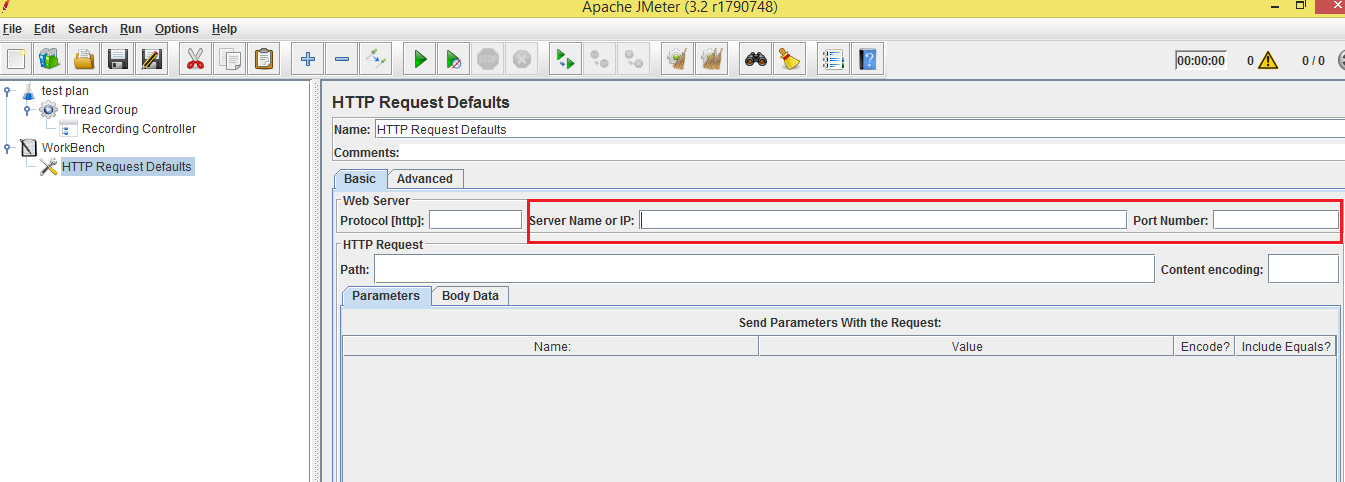
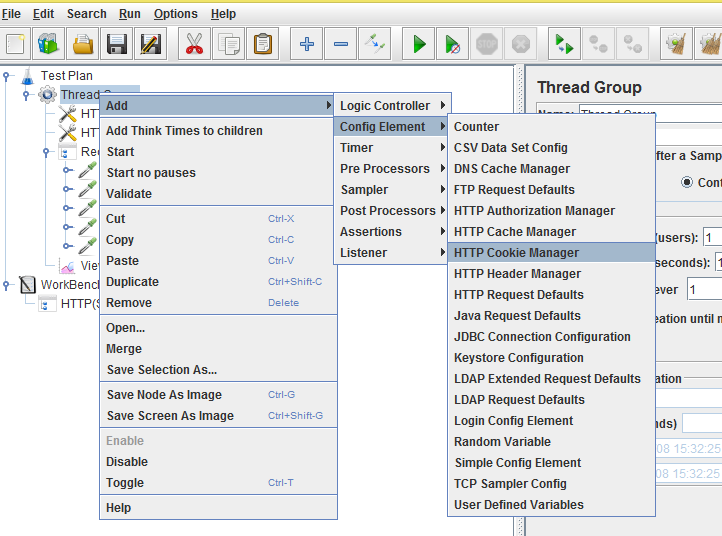
Right-click on Thread Group > Add > Logic controller > Recording Controller
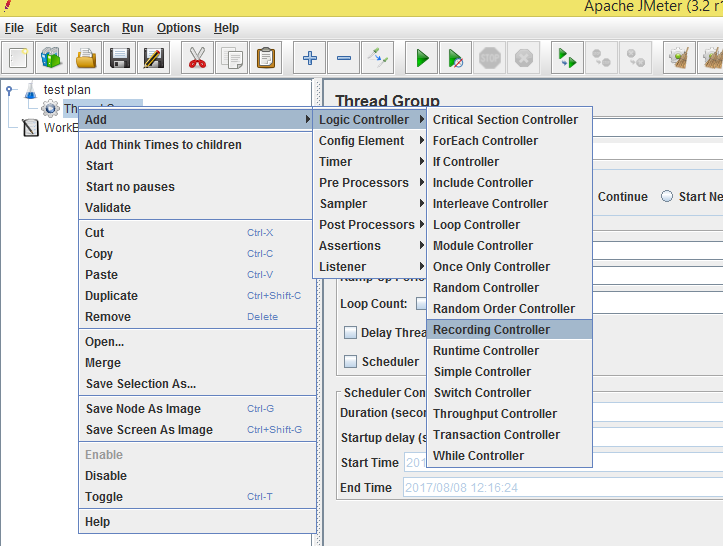
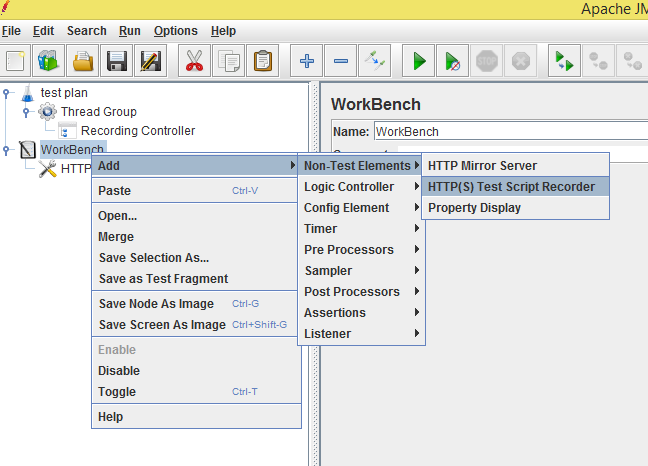
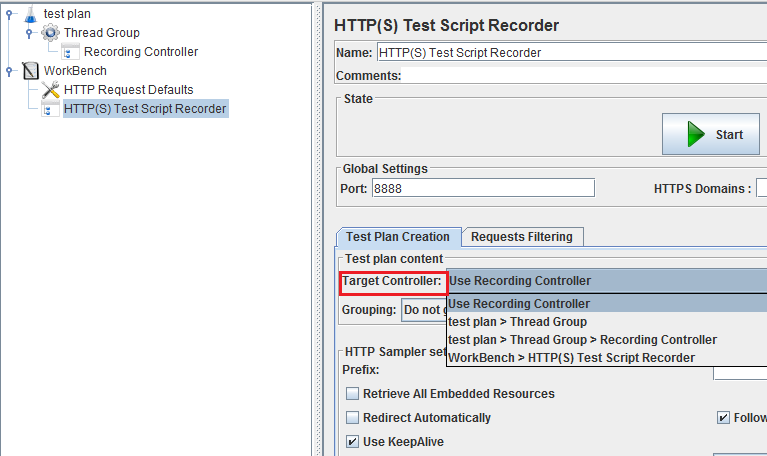
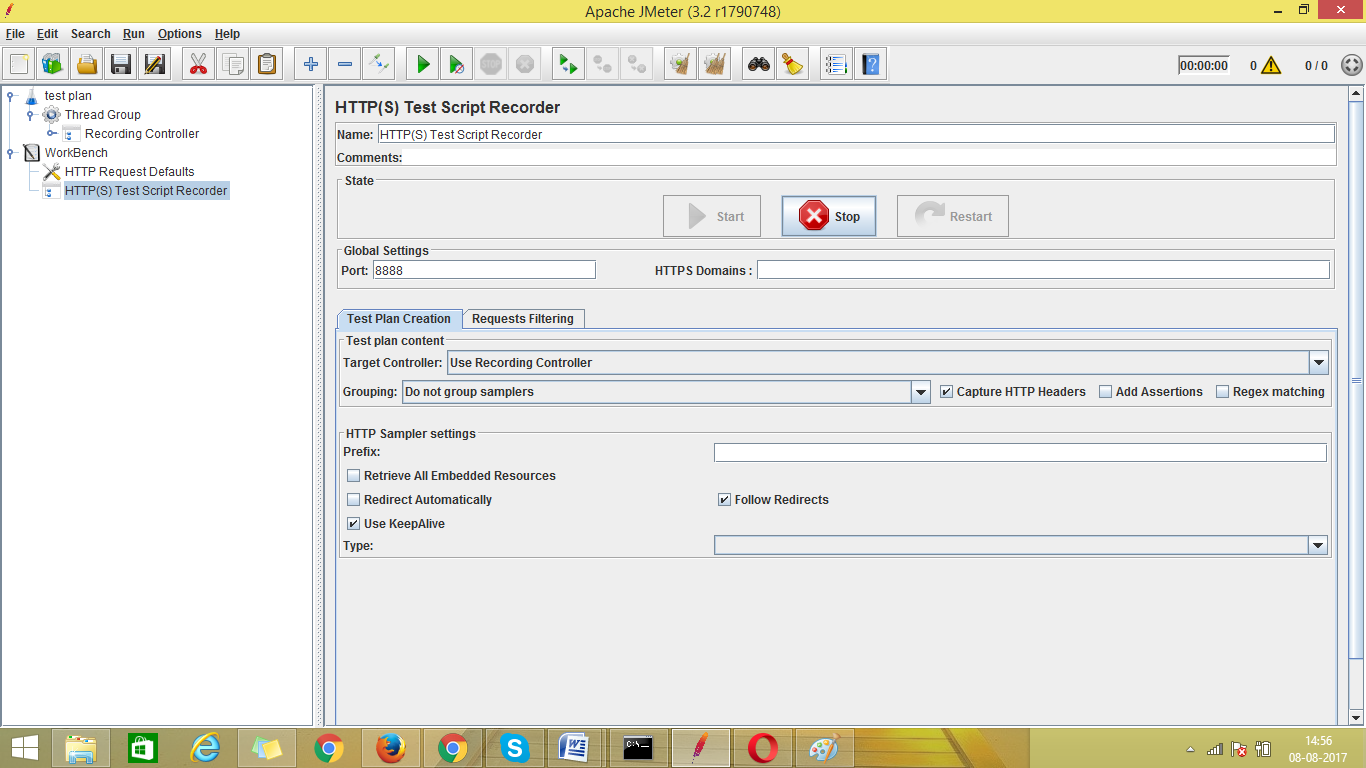
Step 7: Add HTTP Test Script Recorder
Right Click on Workbench–> Add–> Non-Test Elements –> HTTP Test Script Recorder.
Target Controller: Add the place where you want to record the script. Here we choose –use recording controller.
Step 8: Setting of the browser proxy
Open Firefox Browser.
Click on Tools shown at the top menu.
Click on Options shown below
Click on Advance shown on the window after clicking Options.
Click on Network tab shown on the window after clicking Advance.
Click on Settings Button.
Click on Manual proxy configuration
Enter localhost and Port 8888.
Click ok button.
Step 9: Now Record the Script
When you click on the start button on the HTTP(S) Test Script Recorder then the below screen is appeared
Click on the ok button.
Now enter the URL in the browser and navigate the screen according to you. Here we use “ http://crm.ihealthassist.in/index.php?module=Users&action=Login“ for load testing.
After completion, the navigation stops the recording from the HTTP Test Script Recorder.
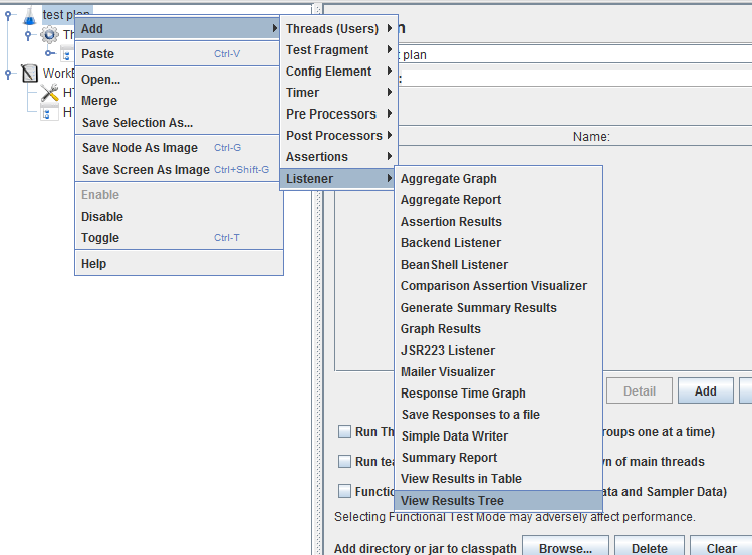
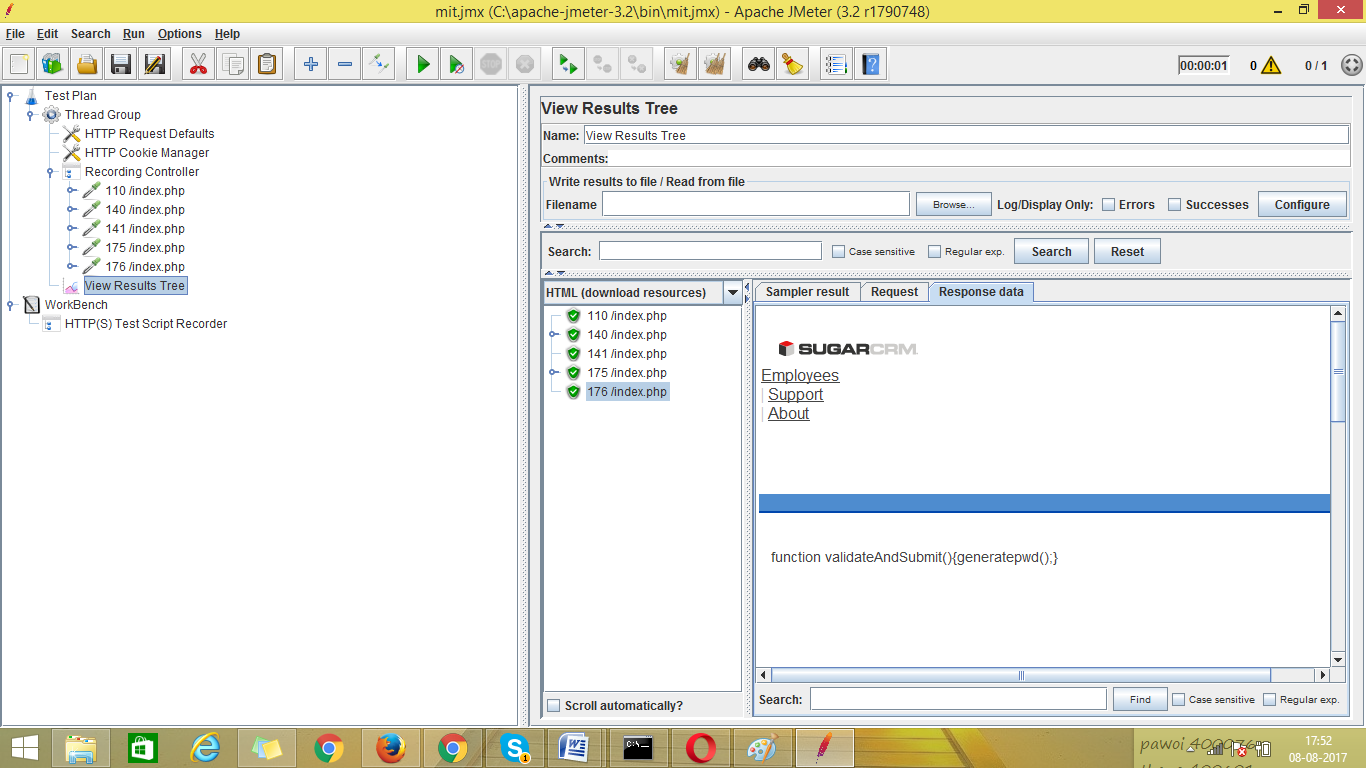
Step 10: Add the Listener
As we can use many listeners in same test plan but here we are using View Results Tree
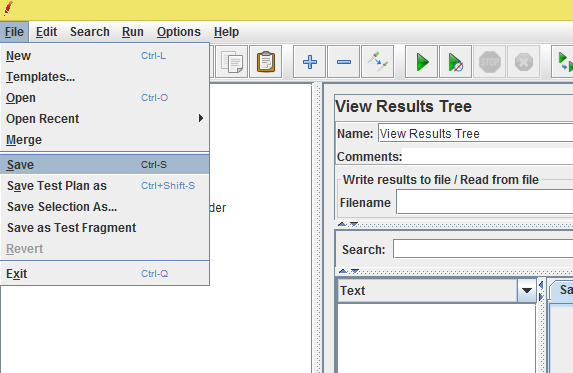
Step 11: Now save the Test Plan
Click on File-> Save
\
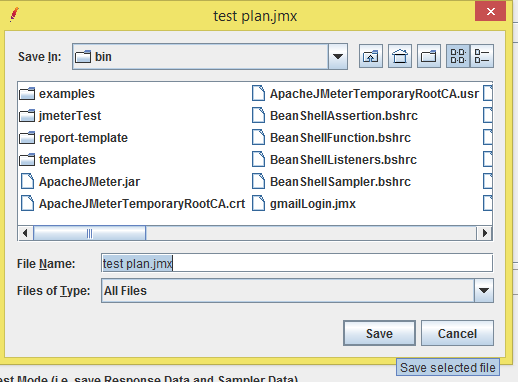
Name the test plan and save test plan in any location where you want to store your Test plan
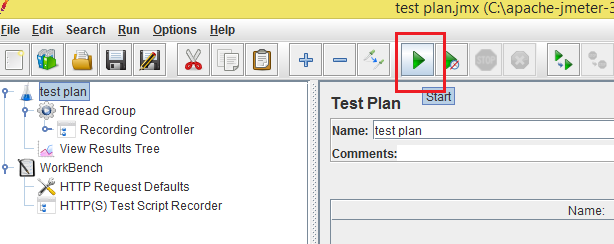
Step 12: Now Run the Test Plan
By simply clicking on button which is shown below, we can easily run our Test Pan
Step 12: After completed the process check the result-
Still Finding it Difficult Watch Our Video for more clarification
To further understand SugarCRM Load Testing or to outsourceSugarCRM load testing you can always contact us here.