
Cryptocoin Explorer are used to view and track transaction in the blockchain network. Many opensource explorer are available in the git repository you can use as per choice. This article explains how to Setup Explorer for Cryptocoin in Ubuntu. Explorer are must for any cryptocoin to track the transaction , blockchain is an public ledger but explorer make its actually visible to user. In short its the ui of block chain technology or block chain based currency. Setup Crytpocoin explorer Cryptocoin explorer requires different software or packages in ubuntu to be installed. This article explains how to setup iquidus Explorer in your Ubuntu Operating System. Major Component required to Setup Explorer. Nodes Js Mongo DB Coin Setup Domain Point Let understand each and every step to Setup Explorer. Node Js Node Js is required to run the UI of the Explorer and interact with coin to fetch the data and insert the same into Mongo DB. You can installed Node Js using There are three ways of installing Node JS 1. Binary Installation. Please view the link for Details Step. Click Here to Install Nodes Js From Binary 2. Installation from Source Code. To install Node js from Source Code Click Here 3. Installation from Ubuntu Packages. To install Node Js from Ubuntu Packages click here Mongo DB Mongo DB serves as an back-end to Explorer. All the transaction in block chain are also stored in Mongo DB. Please click here to Install Mongo DB in your ubuntu system. Once Mongo DB is installed we need to create the database which will be by iquidus explorer and setup the credentials for that. First following commands to ready Mongo DB for your explorer. #Run Mongo $ mongo #Create Database. Below command create the database if database doesn’t exist or it will just open the db for further actions. use explorerDatabase #Create User. db.createUser( { user: “techaroha”, pwd: “techPassword”, roles: [ “readWrite” ] } ) Coin Setup This is the most important part. Coin core daemons needs to installed and config files to be configured correctly to ensure that Explorer can fetch all the required. Here we will take an example of Litecoin. Please click here to install Litecoin Core in Ubuntu 14.0.4 Once the core is installed we need to setup config file. Config file will help connecting explorer to Coin and fetch the required data for Display. Example Configurations for Litecoin Core for explorer is given in the below rpcuser=Yourusername rpcpassword=Yourpassword rpcallowip=127.0.0.1 daemon=1 server=1 listen=1 #Below config is must so that litecoin core will fetch and stored all the transactions txindex=1 Configuring Iquidus – Explorer UI(User Interface) Clone or Download the Source code from GitHub https://github.com/iquidus/explorer or you can clone the repository using following commandgit clone https://github.com/iquidus/explorer Go to explorer folder and rename the file settings.json.template to settings.json Open the new setting.json file and change the following parameters #Change the Title to your coin name “title”: “IQUIDUS”, #Change the coin name “coin”: “Darkcoin”, #change the ticker or Symbol of Coin “symbol”: “DRK”, # change the Logo “logo”: “/images/logo.png”, # change the favicon as per your need “favicon”: “public/favicon.ico”, # Db setting very importtant. # Rember the username password we have setup for mongodb “dbsettings”: { “user”: “techaroha”, “password”: “techarohaPassword”, “database”: “explorerDatabase”, “address”: “localhost”, “port”: 27017 }, # Configuration of coin to connect via RPC and fetch Data. # In the conf file of Litecoin we have setup certain credentials , # we need to user them here // wallet settings “wallet”: { “host”: “localhost”, “port”: 9332, “user”: “YourUsername”, “pass”: “YourPassword” }, Setting Up Cron for Data syncing Open crontab using command crontab -e and add following crons for explorer data sync */5 * * * * cd /var/www/html/blogs/techaroha_wordpress/explorer && /usr/local/bin/node scripts/sync.js index update > /dev/null 2>&1 */7 * * * * cd /home/ubuntu/explorer && /usr/local/bin/node scripts/sync.js market > /dev/null 2>&1 */9 * * * * cd /var/www/html/blogs/techaroha_wordpress/explorer && /usr/local/bin/node scripts/peers.js > /dev/null 2>&1 Now start the node js application in background using following command npm install pm2 start ./bin/cluster –node-args=”–stack-size=10000″ Now finally run the url YourIP:3001 and you will see your explorer. If you want this explorer to be pointed to some domain , please go through this link. Please contact us here if you want any assistance.
Install Node JS From Binary Node JS is required to run the UI of the Explorer and interact with coin to fetch the data and insert the same into Mongo DB. There are three ways of installing Node JS 1. Binary Installation. 2. Installation from Source Code. To install Node JS from Source Code Click Here 3. Installation from Ubuntu Packages. To install Node JS from Ubuntu Packages click here we are going to install Node JS from binary. To install the Node JS from binary follow the below steps step 1: Go to https://nodejs.org/en/download/ and copy latest Linux binary URL https://nodejs.org/dist/v8.9.4/node-v8.9.4-linux-x64.tar.xz step 2: Make a node directory in your src folder sudo mkdir node Step 3: Enter the node directory cd node step 4: Unzip and extract the binaries sudo tar xvf node-v8.9.4-linux-x64.tar.xz –strip-components=1 -C ./node step 4: Make an etc directory in your node folder sudo mkdir node/etc Step 5: execute the following command sudo echo ‘prefix=/usr/local’ > node/etc/npmrc sudo mv node /opt/ sudo chown -R root: /opt/node step 6: Create a symbolic link for a node that points to the new directory sudo ln -s /opt/node/bin/node /usr/local/bin/node sudo ln -s /opt/node/bin/npm /usr/local/bin/npm step 7: Check the Node.js version node -v If you see the versions displayed for a node, you have successfully installed Node.js.

Machine Learning is an idea to learn from examples and experience, without being explicitly programmed. Instead of writing code, you feed data to the generic algorithm, and it builds logic based on the datasets given. In this article, we are going to cover a simple example of Machine Learning by integrating “Google Video-Intelligence” API with Node.js application. What is Google Video-Intelligence? Google under the project of Machine Learning has introduced Video-Intelligence. This makes video searchable and discoverable by extracting contents of a video with an easy to use REST API. furthermore, you can read more about google video intelligence on the google page. Prerequisites for Machine Learning Basic knowledge of Node.js applications Basic knowledge of Google Cloud Platform Step 1: Enable the Google Video-Intelligence API Sign into your google account with valid user credentials In the Google Cloud Platform Console, go to the Manage resources page and select or create a new project. Make sure that billing is enabled for your project. Also, you can find guidelines on the google docs link. Enable the Cloud Video Intelligence API. Step 2: Authenticating to a Cloud API Service To allow your application code to use a Cloud API, you will need to set up the proper credentials for your application to authenticate its identity to the service and to obtain authorization to perform tasks. The simplest authentication scheme is that of an API key. However, an API key does not allow you to authorize to the service, so it is only usable on public data or data you pass directly to the RPC API. Set up an API key After you enable a Cloud API, Go to “API & Services” through navigation menu. Click “Go to Credentials” to click on the Create Credentials button. Select “API key” from the options. You may wish to copy your key and keep it secure (you can also retrieve it from the API Manager→Credentials page). Set up a service account for machine learning Google Cloud Platform API authentication and authorization (commonly grouped together as “auth”) is typically done using a service account. in addition, A service account allows your code to send application credentials directly to the Cloud API. Go to “API & Services” through navigation menu. Click on “Create Credentials” and select “Service account key”. Select service account as “Compute engine default service account”, select key type as JSON and hit the Create button. Finally, GCP Console will generate a JSON key (as a .json text file), prompt you to download the file to your computer. The generated JSON key will be similar to the following sample JSON key: { “type”: “service_account”, “project_id”: “project-id”, “private_key_id”: “some_number”, “private_key”: “—–BEGIN PRIVATE KEY—–\n…. =\n—–END PRIVATE KEY—–\n”, “client_email”: “<api-name>api@project-id.iam.gserviceaccount.com”, “client_id”: “…”, “auth_uri”: “https://accounts.google.com/o/oauth2/auth”, “token_uri”: “https://accounts.google.com/o/oauth2/token”, “auth_provider_x509_cert_url”: “https://www.googleapis.com/oauth2/v1/certs”, “client_x509_cert_url”: “https://www.googleapis.com/…<api-name>api%40project-id.iam.gserviceaccount.com” } Install and initialize the Cloud SDK Download appropriate google cloud SDK to your OS platform. The installer starts a terminal window and runs the gcloud init command in windows (for other operating systems, manually run the same command). Go through the online guide for detailed information. Provide authentication credentials to your application code by running the following command. Replace [PATH] with the location of the JSON file that contains your credentials. gcloud auth activate-service-account –key-file=[PATH] Obtain an authorization token using the command: gcloud auth print-access-token Copy the access token at somewhere safe. Step 3: Integration with Node.js Application Considering you have already a basic Node.js application ready, we will explain how to use google REST APIs. In order to use video-intelligence, we need to install npm package containing client library. Open the command prompt in the project directory and install google cloud library using the following command npm install –save @google-cloud/video-intelligence Once the package is installed, we will write a code providing local storage video URL to the function. This function will convert the video into the base64 format and pass to the google video intelligence API. Code for Implementation // Imports the Google Cloud Video Intelligence library + Node’s fs library const video = require(‘@google-cloud/video-intelligence’).v1; const fs = require(‘fs’); // Creates a client const client = new video.VideoIntelligenceServiceClient(); /** * TODO(developer): Uncomment the following line before running the sample. */ // const path = ‘Local file to analyze, e.g. ./my-file.mp4’; const path = ‘avengers_trailer.mp4’; // Reads a local video file and converts it to base64 const file = fs.readFileSync(path); const inputContent = file.toString(‘base64’); // Constructs request const request = { inputContent: inputContent, features: [‘LABEL_DETECTION’], }; // Detects labels in a video client .annotateVideo(request) .then(results => { const operation = results[0]; console.log(‘Waiting for operation to complete…’); return operation.promise(); }) .then(results => { // Gets annotations for video const annotations = results[0].annotationResults[0]; const labels = annotations.segmentLabelAnnotations; labels.forEach(label => { console.log(`Label ${label.entity.description} occurs at:`); label.segments.forEach(segment => { let time = segment.segment; if (time.startTimeOffset.seconds === undefined) { time.startTimeOffset.seconds = 0; } if (time.startTimeOffset.nanos === undefined) { time.startTimeOffset.nanos = 0; } if (time.endTimeOffset.seconds === undefined) { time.endTimeOffset.seconds = 0; } if (time.endTimeOffset.nanos === undefined) { time.endTimeOffset.nanos = 0; } console.log( `\tStart: ${time.startTimeOffset.seconds}` + `.${(time.startTimeOffset.nanos / 1e6).toFixed(0)}s` ); console.log( `\tEnd: ${time.endTimeOffset.seconds}.` + `${(time.endTimeOffset.nanos / 1e6).toFixed(0)}s` ); console.log(`\tConfidence: ${segment.confidence}`); }); }); callback(labels); }) .catch(err => { console.error(‘ERROR:’, err); }); After giving the request some time (about a minute, typically), the same request returns annotation results in JSON format. Congratulations! You’ve sent your first request to Cloud Video Intelligence API. Note:- Google Video-Intelligence API is not a free service. You can get free credits for demo purpose. You want any assitance or want to develop you application in Machine Learning you can always contact us here. Resource- Google Video-Intelligence Docs
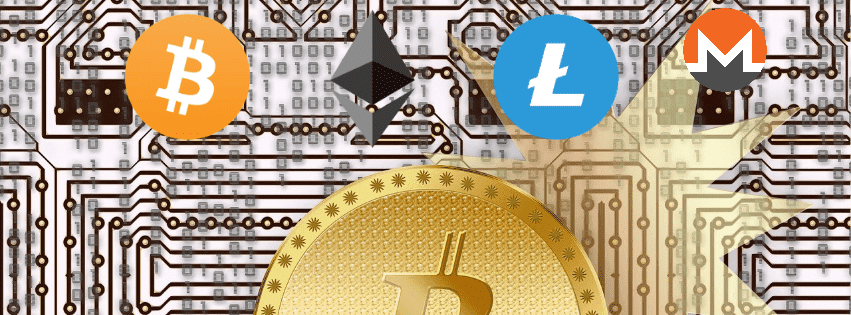
How to List Coin on Exchange and Crypto Exchanges Many Individuals , Teams and Organization are launching crypto coins with Block Chain Technology. The success stories of Sia Coin , Electronium , Ethereum is motivating many to launch their coin on Crypto Coins. Block Chain technology is must for launching coin and the credibility of Block Chain technology helps coin owners to make it acceptable to few in their circles. But the credibility of coins becomes global when its available for exchange on any of the crypto exchange. This is most difficult task where people are stuck in. Whats Required to List Coin on Exchange and Crypto Exchanges Listing on Exchange is not an easy task. Your coins have to pass on some small and very few critical criteria to be eligible for crypto exchange listing. Like some wants coin to be at-least one year old ,some don’t want coin to be pre-mine more than 10% , some wants good records of ICO , some want good community support. Apart from criteria the next constraints is fees.Some exchange charge very heavy fees for listing. Some exchange have voting system but that also require heavy investment for paid voting since paid voting is given more importance than free voting. How to Proceed to List Coin on Exchange and Crypto Exchanges First prepare a good draft of you coin information with atleast below details. Please ensure you are writing Aim and Coin base. Dear Sir, Please find the details of our coin , and please tell us the process to list our coin in your exchange. Aim : Aim of our coin Bitcoin was to replace the fiat currency which digital currency. The algorithm is design to safeguard the interest of individual involve in the transaction. Bitcoin is the public ledger ,in future its expected that it will reduce the usage of paper and will also reduce the corruption to high extent. 1. Name : Bitcoin 2. Ticker : BTC 3. Algo : SHA-256 4. Money Supply : 21,000,000 5. Minimum Commission : 0.001 5. Source : https://github.com/bitcoin 6. Founder Insta Mine : 0% 7. Coin Website : N/A 8. Bitcoin Talk : https://bitcointalk.org 9. Coin Logo : Find Attachment 10. Explorer: https://blockchain.info/ 11. User base: Million+ Users. Thanks & Regards Bitcoin Team (Never write your or your company name over here. Block Chain is all about team and decentrailization) Aim and User Base plays an important role. With good user base you can expect a good response from exchange. Please make sure you are not giving wrong values they will some how figure out with your explorer. Identify the Exchanges and Post them an email This is important task. Since if you go for very good exchange it may take an year to list the coin or finally they may not list our coin citing any reason. This will waster your lot of time. Other major problem with exchanges is that they may charge you very hectic fees that could have been used to bring users to your coin with good purchase often called as Pumping. To ease out your work Techaroha Team have identified few exchanges. 1. poloniex https://poloniex.com/ If your coin is More than 1 Year Old and its have a very good avtive commuity then this is the best exchange for you. Its 100% free , they will list your coin only when they think its importnat and has good follower. Other way round is you must have good connect with management team , this can ease your work. Actually this last lineis true of any organization. 2. HitBTC https://hitbtc.com It’s gaining lot of populairty with so many coin listed in the exchange. But its very very coslty they may charge you upto 10 BTC to list the coin in their exchange. If you have big pocket and want to be sure that your coin will work and willing to invest this exchange is for you. 3. Coinbase https://www.coinbase.com/ You have good community and if you coin is listed in Gdax then this exchange is best for you. It will be an easy entry if your coin is listed on Gdax. 4. Bitridex https://bitridex.com/ If you don’t want to much invest in listing and want regular buys of your coin then this is the best exchange. They charge nominal fee for exchange listing. If have different offers to suit your need. Checkout in website or drop them a mail you can expect a response in max 3-4 Hours 5. Mercatox https://mercatox.com/ Mercatox is gaining popularity among small coins, if you can arrange for the voting specially paid voting or voting from active members you will have very high probability to list this coin one exchange. Techaroha team a Block Chain development company based in Mumbai(India) has experience block chain development team and can help you in all phases of coin development and then listing it on the exchange. Please contact us here if you want any assistance. To get the details of our service please go through the following link To Launch Cryptocurrency will please click here. You want help with ICO please click here.